| |
|
||||||
|
|
|||||||
Projects
The top-level entities in DESTool are so called Projects that perform a particular DES design or analysis task. A DESTool project consists of
input and output data organised in Variables, e.g. of faudes-type System or Alphabet;
a list of operations, organized as a Script; and
a Simulator to inspect the outcome of the design.
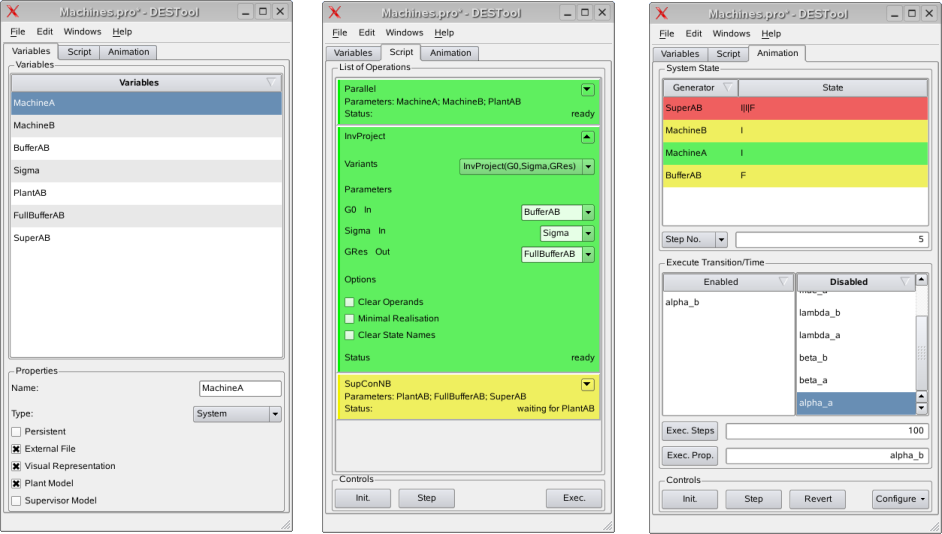
To access individual items within a project, DESTool provides a Project Browser. It comes with three tabs, one each for variables, the script and the simulator.
Projects can be saved to and opened from disk via the File Menu. In order to make sure that DESTool keeps all relevant data in a particular folder, you should save the project to that folder before you populate the script or variable pool.
Example
We give step-by-step instructions on how-to investigate the simple machine scenario by a DESTool project.
Our plant consists of two machines MachineA and MachineB, that process one workpiece at a time. MachineA on command takes a workpiece form an unlimited source, processes it, and then drops in into the buffer BufferAB, which can hold one workpiece. MachineB on command fetches a workpiece from the BufferAB, processes it, and delivers it to an unlimited sink. Both machines may fail in processing the workpiece. In this case, the workpiece will be removed and the machine needs to be repaired. The goal is to synthesise a supervisor that controls both machines to prevent a buffer overflow.
To prepare a DESTool project, first create an empty folder (e.g. ~/Machines). Then start DESTool, and use Save from the File menu to save the empty project to a project file inside the newly created folder (e.g. ~/Machines/Machines.pro).
Plant Components
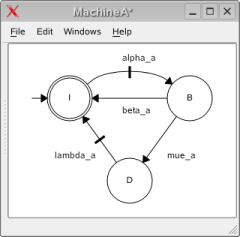
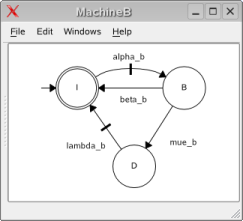
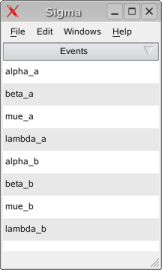
The two machines are formally considered as the plant, referring to the events
-
alpha_a, alpha_b: machine A/B to take a workpiece
-
beta_a, beta_b: machine A/B to complete processing a workpiece
-
mue_a, mue_b: machine A/B to fail
-
lambda_a, lambda_b: machine A/B to be repaired
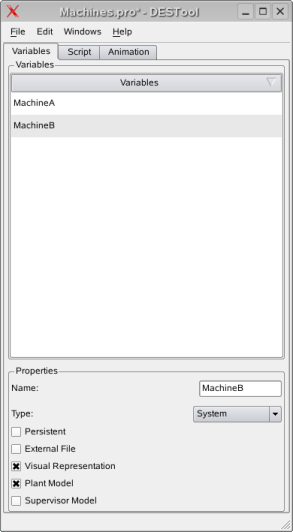
To create one variable of faudes-type System for each machine, you may use the Variables tab of the project browser:
use New Variable from the File menu to create a new variable;
inspect the properties section to ensure the type is System and to set the variable name to MachineA;
make sure that the variable is tagged Persistent, Plant Model and Visual Representation.
To show the variables value (an empty generator) in a window, use the context menu of in the variable list. You can now graphically enter the plant model. Use the Shift key to insert states and transitions, use the context menu to edit state and event attributes (e.g. names and controllability flags).
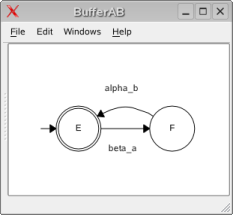
Specification
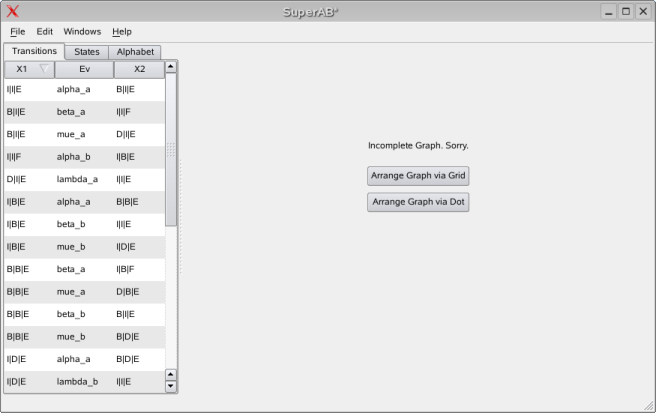
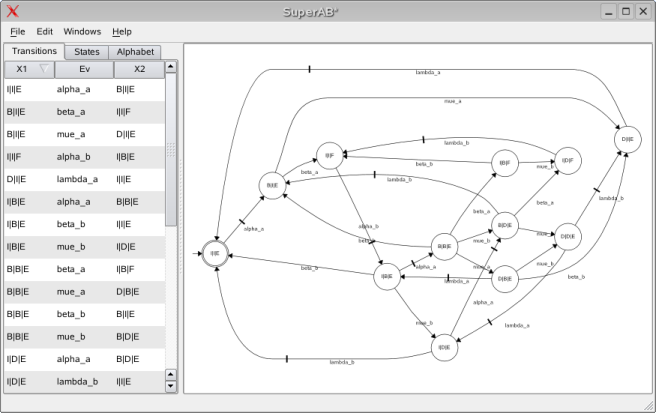
For the closed loop specification, we model the buffer with a capacity of one workpiece, i.e. the buffer is either empty for full. The screen-shot shows both, the list view and the graphics view on the specification generator BufferAB.
We also need a variable of type EventSet to represent the overall alphabet.
Synthesis Script
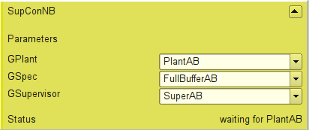
Synthesis consists of three steps. First we compose the two plant components MachineA and MachineB to an overall plant model PlantAB. Next, we use the inverse projection to add self-loops to the specification. Third, we compute the least restrictive supervisor that enforces the specification BufferAB for PlantAB.
You may use the Script tab from the project browser to set up an according script:
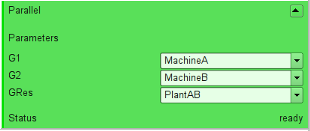
introduce three operations Parallel, InvProject and SupConNB by selecting them from the Insert Operation button; the operations will be coloured red to indicate that no operand or result variables have been assigned;
in Parallel, set the operands to MachineA and MachineB; for the result, enter a new variable name PlantAB; observe green to indicate that this operation is ready to be performed; however, the default type is Generator, and does not maintain controllability attributes; therefore, you should use the context menu to change the type to System;
- in InvProject, choose the signature with three arguments, and set them to BufferAB, Sigma and FullBufferAB, respectively; the specification does not require event attributes, and, hence, type Generator is fine;
-

-
in SupConNB set the arguments to PlantAB, FullBufferAB and SuperAB, respectively.
To run the script, use the Exec. button below. Observe that all operations turn grey to indicate successful completion.
To inspect the resulting supervisor, you may use the context menu of the result variable in the synthesis operation. Note that the supervisor will be shown as list view by default. To automatically generate a graphics view, adjust the vertical splitter and click Generate via dot. This requires the Graphviz package to be installed.
In order to save your supervisor to separate file, choose External File from the variable context menu.
libFAUDES 2.33h --- 2025.09.16 --- with "synthesis-omegaaut-observer-diagnosis-iosystem-hiosys-multitasking-coordinationcontrol-timed-iodevice-priorities-simulator-luabindings"